Drywall — also called gypsum board or gyproc — is the standard wall and ceiling material in most Canadian homes built after the 1950s. Over time, it sustains damage from doorknobs, fasteners, settling, and moisture. Knowing how to make a clean repair saves time and avoids unnecessary replacement of entire panels.
Assessing the Damage First
Before choosing a repair method, examine the damage carefully. Holes under 10 cm in diameter can usually be filled without backing support. Larger holes require a backing board or a California patch. Any discolouration, soft texture, or crumbling around the edges suggests water damage — in that case, the source of moisture must be addressed before repairing the surface.
Note on Older Homes
In homes built before 1980, wall and ceiling finishes may contain asbestos — particularly textured surfaces, joint compounds, and some plasters. If you are unsure about the age of the materials, have a sample tested by a certified asbestos inspector before sanding or cutting. Health Canada provides guidance on asbestos identification at canada.ca.
Materials and Tools You Will Need
| Item | Purpose |
|---|---|
| Joint compound (all-purpose or lightweight) | Filling and finishing |
| Drywall mesh tape or paper tape | Reinforcing cracks and seams |
| Putty knife (4–6 inch) | Applying and feathering compound |
| Sandpaper (120–220 grit) | Smoothing between coats |
| Drywall patch kit or backing board | Larger holes over 10 cm |
| Drywall screws (1-5/8 inch) | Securing backing |
| Primer | Sealing repair before painting |

Repairing Small Holes (Under 10 cm)
For nail holes and small dents, apply a thin coat of lightweight joint compound with a putty knife. Work the compound into the hole, then smooth it flush with the surrounding wall. Allow it to dry fully — typically 4 to 6 hours at room temperature in Canadian conditions, though humidity can extend drying time.
Once dry, sand lightly with 120-grit sandpaper, then apply a second thin coat. After a final sanding with 220-grit paper, the surface is ready for primer and paint. Skipping primer over fresh compound is a common mistake — unpainted compound absorbs paint unevenly and results in visible sheen differences.
Repairing Medium Holes (10–20 cm)
Holes in this range require a backing surface before compound can be applied. A California patch — where a piece of drywall slightly larger than the hole is cut to include a paper border that adheres to the existing wall — is one of the most effective approaches for holes up to roughly 20 cm.
- Cut a piece of drywall about 5 cm larger on each side than the hole.
- Score the back only — not through the paper face — along the edges, then snap and peel away the gypsum core, leaving a border of intact paper facing.
- Trim the hole in the wall to match the gypsum core of your patch.
- Apply compound around the hole opening, press the patch in place, and smooth the paper border flat.
- Apply three thin coats of joint compound, feathering each coat outward from the patch edges.
Repairing Large Holes (Over 20 cm)
Larger sections require either a backing board between studs or a full panel replacement. If the hole falls between studs, cut the damaged area back to the nearest stud on each side using a drywall saw. Attach a piece of 2×4 lumber as blocking between the studs to provide a fastening surface for the patch panel. Cut a new piece of drywall to fit, fasten it with drywall screws, and tape all joints before applying compound.
Stud Location
Before cutting into any wall, use a stud finder to identify stud locations and mark them. Electrical wiring typically runs through stud cavities and along the top and bottom plates. Cutting without checking is a risk that leads to damaged wiring or worse. See also our article on home repair safety practices.
Finishing the Repair
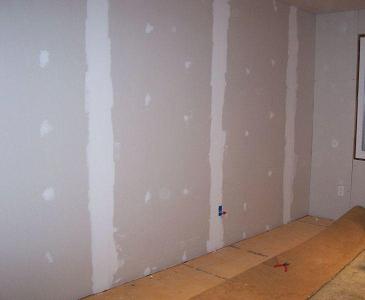
Regardless of the repair method, the finishing process follows the same pattern: three thin coats of joint compound, each feathered further out than the last, with light sanding between each coat once dry. The goal is a surface that blends imperceptibly with the surrounding wall.
In Canada, interior spaces can be quite dry in winter due to forced-air heating, which speeds drying time but can cause compound to crack if applied too thickly. Thin coats — no more than 3 mm per application — reduce this risk. After the final sanding, wipe the surface with a slightly damp cloth to remove all dust before priming.
Priming and Painting
Use a drywall primer-sealer on all repaired areas before applying finish paint. This step is not optional if you want a consistent sheen. After priming, you may need to apply a skim coat of compound in areas where the primer reveals imperfections. A second prime coat ensures a uniform surface for the final colour coat.
Texture Matching
If the existing wall has a texture — orange peel, knockdown, or skip trowel — matching it is the most challenging part of the repair. Orange peel texture can be replicated using a light roller or spray texture in a can. Knockdown texture requires diluted joint compound applied with a brush or sponge, then knocked down with a trowel after partial drying. Sample the technique on cardboard first before applying to the wall.